How to Fix WordPress “Installation Failed: Could Not Create Directory” Error
If you’re seeing a “Could not create directory” error when trying to install WordPress, it means that your web host doesn’t have the correct permissions set on your WordPress install.
Here’s how to fix the WordPress “Could not create directory” error:
Via FTP:
- Login to your website’s FTP via an FTP client like FileZilla
- Choose 3 folders wp_content, wp_includes, and wp_admin then right-click to open the “File permissions…” option.
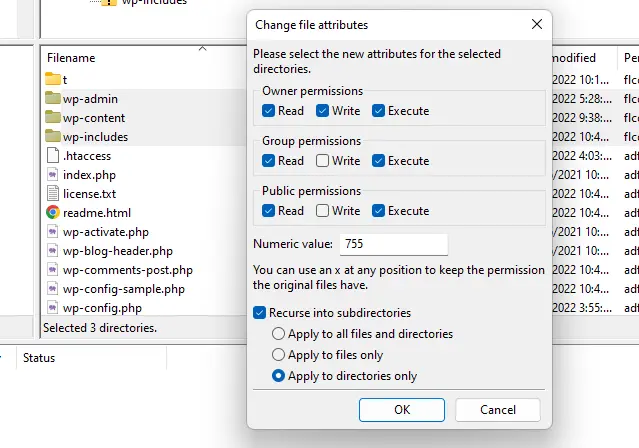
- Set and tick these settings: Numeric value: 755, Recurse into subdirectories, Apply to directories only.
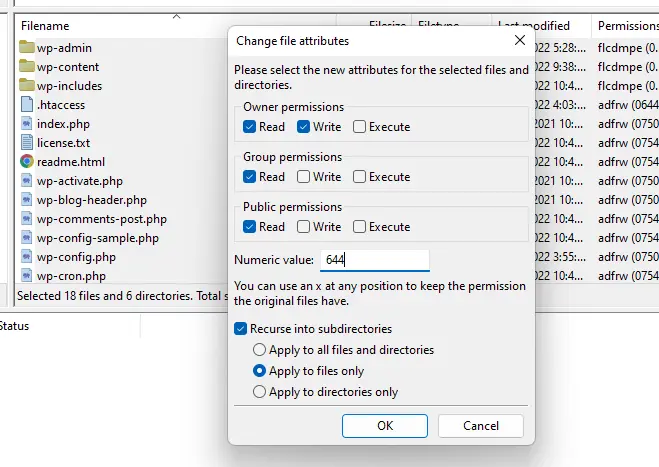
- On the root of your WordPress installation, select all files and folders, right-click then choose the “File permissions…” option.
- Set and tick these settings: Numeric value: 644, Recurse into subdirectories, Apply to files only.
Via hosting panel:
- Log in to your web hosting account (cPanel, Plesk, etc.) and go to the File Manager.
- Locate the wp-content folder in your WordPress install.
- Right-click on the wp-content folder and select “Change Permissions”.
- Make sure that the “Owner” is set to “apache” or “www-data”. If it’s not, change it to that.
- Make sure the “Group” is set to “apache” or “www-data”. If it’s not, change it to that.
- Make sure the “Other” field is set to “Read and Write”. If it’s not, change it to that.
- Click on the “Change Permissions” button.
You should now be able to install WordPress without seeing the “Could not create directory” error!