How to Start XAMPP in Windows 11 Automatically
This article will show you how to set up and start Apache, MySQL, and PHP (XAMPP) on Windows 11. This is a simple guide for beginners who want to use XAMPP but don’t know where or how to get started.
The installation process of the three components is relatively straightforward, so we’ll go through that first. Then we’ll discuss how to start XAMPP automatically when Windows starts up.
Installing XAMPP
- Download the latest version of XAMPP from here.
- Run the installer and choose where you want to install XAMPP. For this guide, we’ll assume it’s been installed in the default location: C:\xampp.
- Choose which components you want to install. We’ll be selecting Apache, MySQL, for this guide, but feel free to select other components if you wish (e.g., Filezilla or Mercury).
- Follow the rest of the installation wizard and wait for XAMPP to finish installing.
Configuring XAMPP To Start Automatically
The Startup folder is a special folder in Windows that contains shortcuts to programs that should start automatically when Windows starts. We can copy the shortcut of the XAMPP app to this folder and it will start automatically every time Windows starts.
In this part, we will add a shortcut to the XAMPP app and copy it to the Windows 11 Startup folder.
Step 1
You can create a shortcut to the XAMPP by right-clicking on the XAMPP-Control.exe in the C:\xampp folder and then choosing to Show more topics > Create shortcut.
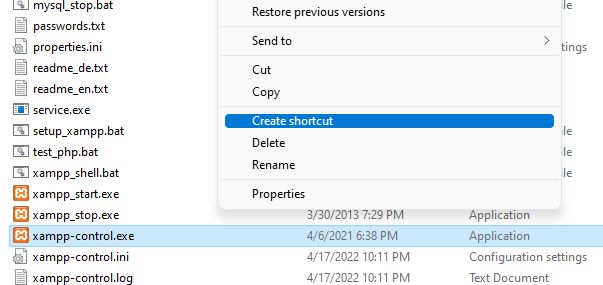
A shortcut of the xampp-control.exe file will be created in the same directory.
Step 2
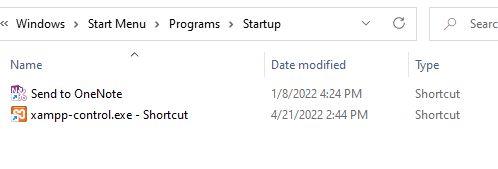
To find the Startup folder, open up File Explorer and go to This PC > C:\Users\[username]\AppData\Roaming\Microsoft\Windows\Start Menu\Programs\Startup.
You can also find the Startup folder by going to Start > Run and typing in “shell:startup”. This will open up the Startup folder directly.
Now you can now copy or move the created shortcut to the Startup folder.
Add Services to Auto-Start
After installing XAMPP, you can add the services of Apache and MySQL to auto-start so that they will start automatically when Windows starts up.
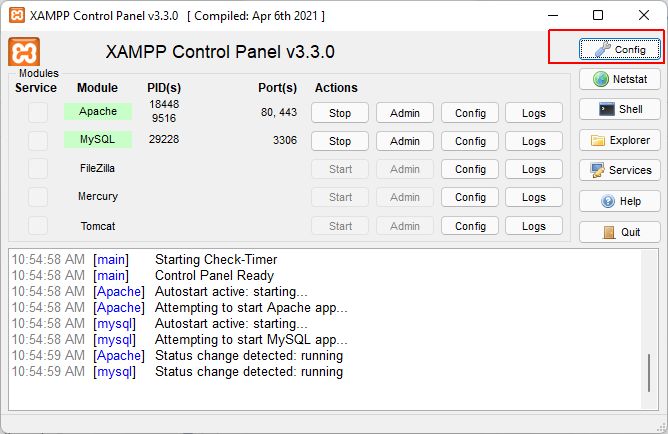
- Open the XAMPP Control Panel icon (should be in your Start Menu or Desktop).
- Click on the Config button on the top right part of the app.
- Under Auto-start of modules section, choose the services you want it to automatically start. In my case, I chose MySQL and Apache.
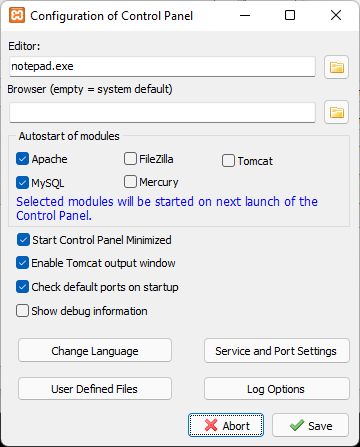
- Click on Save button to apply the changes.
That’s it! Now, every time you start Windows, XAMPP will automatically start running in the background. You can verify that it’s running by checking if the XAMPP Control Panel icon is in the system tray or not.